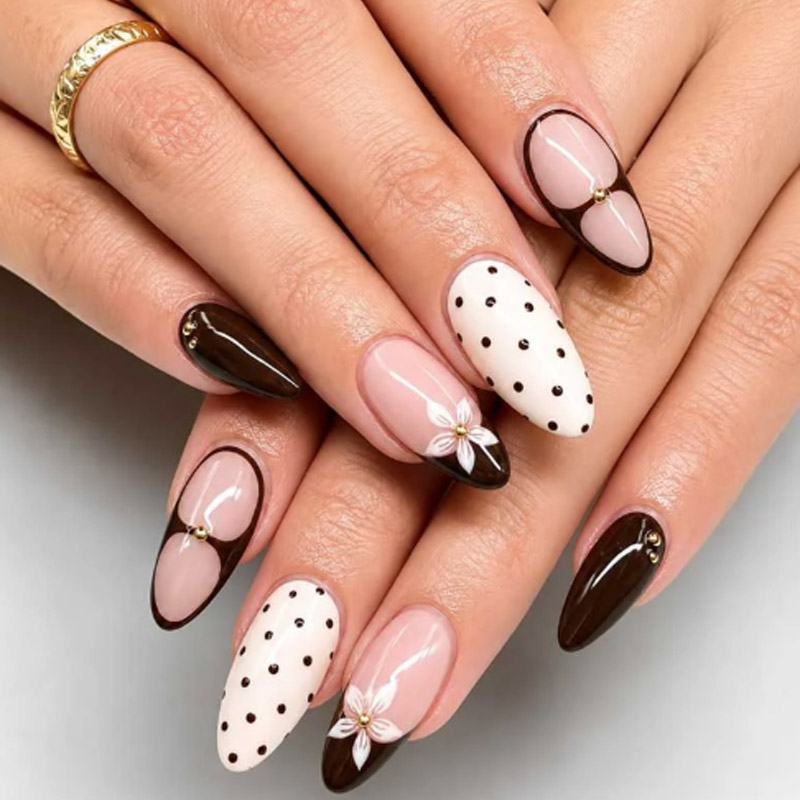
When beauty brands think about press on nail packaging, attention often goes first to the outer box: logo placement, colors, typography, collection names, and printed artwork.
But the tray inside the box can be just as important.
A press-on nail tray determines how the nails are arranged, how clearly the customer can see the set, whether individual pieces move during handling, whether 3D decoration has enough space, and whether the finished product still looks organized when the package reaches the retailer or consumer.
For private label buyers, the tray should therefore be developed around the actual nail set rather than selected only because it fits inside a standard box.
A short square set with a flat glossy finish may need very little clearance. Long coffin nails, curved almond tips, rhinestones, charms, or 3D flowers can create completely different requirements.
The right press on nail packaging system needs to balance three things:
- Fit
- Protection
- Presentation
If the tray holds the nails too tightly, products can become difficult to remove or may contact surrounding decoration. If it is too loose, nails can shift during handling. If the layout focuses only on appearance, accessories may end up moving into the nail area or the most decorative pieces may be placed where they are poorly protected.
This guide explains how brands should evaluate press-on nail trays before approving a private label package.
Why the Tray Matters in Press On Nail Packaging
A tray has several jobs at the same time.
It needs to:
- Position individual nail tips
- Separate different sizes
- Limit movement
- Protect artwork and decoration
- Present the full set clearly
- Fit into the outer box
- Leave room for accessories where required
That makes the tray a functional part of press on nail packaging, not simply an internal display component.
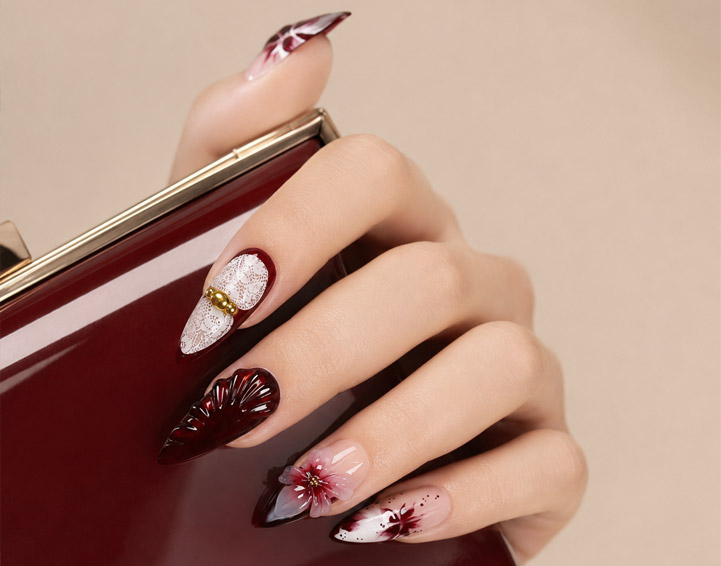
Imagine a highly detailed handmade floral set.
The nails themselves may be perfectly produced, but if two raised flowers touch during transport, part of the decoration may become damaged.
Alternatively, a short minimal set may be packed in a tray that is much larger than necessary, making the product look visually lost inside the package.
Both are packaging problems.
The best tray should suit the physical characteristics and commercial positioning of the product.
Start With the Actual Nail Dimensions
Before selecting the tray, measure the finished nail product.
Do not design press on nail packaging from a generic nail-tip template if the final product includes additional coatings or decorations.
Important dimensions include:
- Overall nail length
- Maximum nail width
- Nail curvature
- Nail thickness
- Maximum decoration height
- Decoration width beyond the sidewalls
The largest nail is particularly important, but it should not be the only piece measured.
Different nail sizes may be arranged in different tray positions, and the tallest decoration may not appear on the thumb.
For example, a ring-finger hero nail may contain a large flower even though the thumb itself is relatively flat.
The tray should therefore be evaluated using the complete finished set.
Nail Shape Changes Tray Requirements
Different shapes occupy tray space differently.
Short Square
Short square products generally require less longitudinal space.
They can often work with compact press on nail packaging, particularly when decoration is flat.
However, the wider free edge should still fit comfortably without being squeezed.
Oval
Oval tips have a rounded shape that can fit relatively compact layouts.
They are particularly suitable for:
- Sheer finishes
- Florals
- Pearl details
- Everyday collections
Almond
Almond nails taper toward the tip.
Longer almond products need enough clearance to prevent the pointed end from contacting the edge of the tray or box.
Coffin
Coffin nails can occupy more width toward the upper part of the nail because the tapered sidewalls end in a flat edge.
Long coffin products may require more overall internal space.
Stiletto
Stiletto tips need careful length clearance.
The pointed free edge should not remain under continuous pressure against packaging.
Brands can review Xingyi’s shape and size guide before developing the internal press on nail packaging layout.
Curvature Matters More Than It Appears
The tray should not be evaluated only from a top-down view.
Press-on nail tips are curved three-dimensional objects.
A nail with greater curvature may sit higher in the tray than a flatter nail even when both have the same length and width.
This affects:
- Vertical clearance
- Nail stability
- Lid distance
- Appearance from the front
For press on nail packaging, the package prototype should therefore contain the actual intended nail shape.
Using a flat sample or different mould simply to test box dimensions may give inaccurate results.
Flat Nail Art and 3D Nail Art Need Different Trays
One of the most important tray decisions is whether the nail decoration remains within the normal profile of the nail.
Flat artwork includes:
- Solid colors
- French designs
- Printed artwork
- Gradients
- Jelly finishes
- Cat-eye
- Chrome
- Fine hand painting
These products usually require less vertical space.
Three-dimensional products may include:
- Rhinestones
- Pearls
- Charms
- Bows
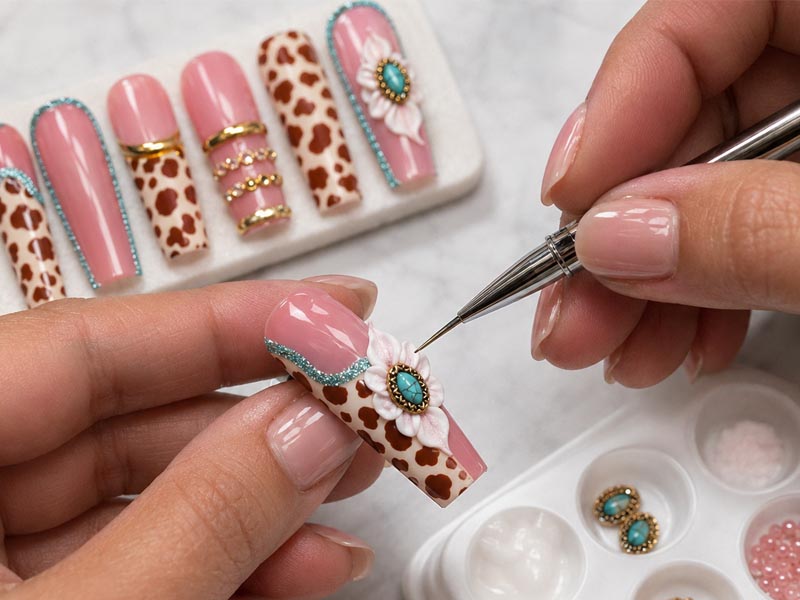
- Sculpted flowers
- Raised gel textures
These can significantly change press on nail packaging requirements.
The tray needs to consider not only nail height but also how decorations extend sideways.
A flower can fit vertically while still touching the neighboring nail.
For dimensional products, buyers should check both horizontal and vertical clearance.
Measure the Highest Decoration
A common packaging mistake is measuring only the base nail tip.
Instead, measure the complete finished hero nail.
For example:
Base nail height: relatively low
3D flower: extends several millimeters above the surface
The required tray and lid clearance must be based on the complete product.
If the decoration touches the lid, several problems can occur:
- Flowers may flatten
- Charms may shift
- Rhinestones may loosen
- Surface finishes may become scratched
The press on nail packaging should protect the most vulnerable product in the set, not simply fit the easiest one.
Give Hero Nails More Space
Many press-on nail designs use visual hierarchy.
A set may contain:
- Two hero nails
- Several supporting nails
- Several simple nails
The tray can reflect that hierarchy.
Hero nails with:
- Large flowers
- Multiple rhinestones
- Charms
- Complex artwork
can be placed where they have more space around them.
Supporting nails can sit closer together if they remain relatively flat.
This is often better than arranging every nail purely according to symmetrical spacing.
The tray’s job is both presentation and protection.
Nail Spacing Should Be Tested Physically
There is no universal ideal spacing for every press on nail packaging tray.
The correct spacing depends on:
- Nail width
- Decoration
- Product movement
- Tray holding method
The most reliable test is physical.
Place the final nails into the tray and gently handle the package.
Check whether:
- Neighboring nails touch
- Flowers collide
- Rhinestones rub against another surface
- Nails move out of alignment
A tray can look correct in a CAD drawing while behaving differently with real products.
Always approve the physical sample.
Decide How the Nails Should Be Held
Different tray structures can hold press-on nails in different ways.
Depending on the packaging design, nails may sit in:
- Individual recesses
- Slots
- Raised supports
- Adhesive-based display structures
- Molded positions
The holding method should balance:
Security
The nails should not move excessively.
Ease of Removal
The customer should be able to remove the nails without damaging them.
Visual Presentation
The nails should remain aligned.
If press on nail packaging holds the product too tightly, customers may struggle to remove delicate decorated nails.
If the hold is too weak, the set may look disorganized after shipping.
Avoid Excessive Adhesive Contact With Finished Surfaces
Some tray systems use adhesive to secure products.
If adhesive is used, buyers should confirm:
- Where it touches the nail
- Whether residue remains
- Whether removal affects the finish
- Whether the hold remains stable during transport
This is particularly important with:
- Matte finishes
- Chrome
- High-gloss surfaces
- Handmade decoration
A tray should not protect the product during shipping only to create another problem when the customer removes it.
Testing should use the actual finished surface.
Think About the Visual Order of Nail Sizes
The tray also communicates how organized the product feels.
A complete set can be arranged:
- Largest to smallest
- By likely finger position
- Symmetrically
- Around hero designs
For retail press on nail packaging, customers should be able to understand what they are looking at.
If all nail sizes appear randomly mixed, the product can look less controlled.
A clear size order can make the package easier to inspect visually and may also help customers when they begin sizing the set.
The Tray Should Support the Product Story
Packaging presentation should match the product category.
Everyday Collection
A simple, clean layout can reinforce:
- Wearability
- Minimalism
- Ease of use
Handmade Collection
The tray may emphasize:
- Hero nails
- Detailed artwork
- Dimensional decoration
Bridal Collection
A softer layout with visible pearl or floral products can reinforce the occasion.
Fashion Collection
Chrome, cat-eye, metallic, or bold designs may benefit from a layout that makes reflective finishes easy to see.
The press on nail packaging should allow the product itself to communicate the collection concept.
Transparent Packaging Makes Tray Quality More Visible
A transparent lid or window can make the nails easier to evaluate before purchase.
It also makes tray problems easier to see.
Customers can notice:
- Crooked nails
- Empty-looking areas
- Loose accessories
- Misaligned pieces
- Poor spacing
For transparent press on nail packaging, internal organization becomes part of the visual branding.
The tray should therefore be treated almost like a retail display.
Plan Accessory Placement at the Same Time
Many sets include more than nail tips.
Possible accessories include:
- Adhesive tabs
- Nail glue
- File
- Wooden stick
- Preparation pad
- Instructions
These should have defined locations in the package.
A common mistake is completing the tray for the nails first and then trying to fit accessories into whatever space remains.
That can cause:
- Loose components
- Crowded packaging
- Accessories covering the nails
- Surface scratching
For private label press on nail packaging, create a complete component list before the final tray structure is approved.
Separate Accessories From Delicate Nail Art
If the set contains highly decorated nails, accessories should not move into the nail area.
A file or nail glue tube can create more physical contact than a lightweight insert card.
The internal structure may therefore need:
- Separate compartments
- Dividers
- Secure accessory positions
This becomes particularly important for e-commerce products that experience repeated handling before reaching the customer.
The complete package should be tested in realistic orientations rather than only lying flat on a table.
Consider How the Box May Be Handled
Retail packages are not always transported upright.
They may be:
- Stacked
- Rotated
- Shipped on their side
- Moved repeatedly
- Placed inside larger cartons
The tray should keep the press on nail packaging organized through normal distribution handling.
One practical test is to assemble the full sample package and gently rotate it through several orientations.
Afterward, check whether:
- Nails remain in place
- Accessories move
- Decorations contact the lid
- The tray shifts inside the outer box
This simple test can reveal design problems before production.
Shipping Protection Is Different From Retail Presentation
The tray is primarily part of the retail package, but the completed retail package will usually travel inside larger shipping packaging.
Do not expect a decorative retail tray alone to solve every shipping risk.
The complete transport system may include:
- Retail tray
- Outer retail box
- Inner carton
- Master carton
- Protective shipping materials
ISTA develops standardized packaged-product testing procedures intended to help evaluate how packaged products respond to distribution hazards such as shock, vibration, and compression. Brands with larger retail or distribution programs can use appropriate packaging-testing methods when more formal transport validation is needed.
The official ISTA information is available at:
For buyers, the practical lesson is that press on nail packaging should be evaluated as part of the full distribution system rather than only for shelf appearance.
Packaging Materials Should Follow the Actual Product Need
Tray material should be selected based on:
- Structural requirement
- Product visibility
- Decoration protection
- Target presentation
- Local recycling or material requirements
The most important point is to avoid making unsupported environmental claims.
If a brand intends to describe packaging as recyclable, recycled, reduced-plastic, or another environmental attribute, the claim should correspond to the actual structure and destination-market requirements.
The U.S. Federal Trade Commission’s Green Guides explain that broad, unqualified environmental claims can be difficult to substantiate and that marketers should clearly communicate the basis for environmental claims.
Official FTC guidance:
https://www.ftc.gov/business-guidance/resources/environmental-claims-summary-green-guides
Specific, supportable packaging information is more useful than simply printing “eco-friendly” on press on nail packaging.
Standardize Tray Sizes Where Practical
Private label brands do not necessarily need a unique tray for every SKU.
A more scalable system might use:
Tray A — Short and Medium Flat Designs
Suitable for:
- Short square
- Oval
- Medium almond
- Simple artwork
Tray B — Long Designs
Suitable for:
- Long almond
- Coffin
- Stiletto
Tray C — Deep Decorative Designs
Suitable for:
- 3D flowers
- Large rhinestones
- Charms
Different printed boxes can still create unique collection identities while the internal tray system remains controlled.
This makes future press on nail packaging development easier to manage.
Do Not Force Every Product Into One Tray
Standardization has limits.
If a 3D floral product clearly does not fit the standard tray, forcing it into the existing packaging can create:
- Compressed flowers
- Poor presentation
- Excessive movement
- Difficult product removal
A new tray format should be created when the physical product genuinely requires it.
Standardization should reduce unnecessary complexity—not create avoidable product damage.
Packaging Approval Should Use the Final Nail Sample
The packaging sample should contain the actual approved nail design whenever possible.
Do not approve a tray using:
- A different shape
- Undecorated tips
- Another length
when the final product is dramatically different.
A press on nail packaging tray approved using flat medium almond nails does not automatically prove that a long 3D floral set will fit.
Use the closest possible production-equivalent product.
Keep an Approved Packaging Sample
Once the tray and retail box are approved, retain a complete physical reference.
The reference can include:
- Tray
- Outer box
- Nail arrangement
- Accessories
- Insert
- Final artwork
Give it a packaging code.
For example:
PKG-3D-02
Then connect it with the nail SKU.
This makes future production and reorders easier to control.
Create a Tray Approval Checklist
Before approving press on nail packaging, check the following.
Fit
- Largest nail fits
- Longest nail fits
- Curvature fits
- All sizes sit properly
Decoration
- Highest decoration has clearance
- Side decoration does not touch neighboring nails
- Hero nails are protected
Holding
- Nails remain aligned
- Nails are removable
- No damaging adhesive residue
Accessories
- All accessories fit
- Loose components cannot damage the nails
Presentation
- Size arrangement is clear
- Hero designs remain visible
- Transparent packaging looks organized
Box Compatibility
- Tray fits the outer box
- Tray does not shift excessively
- Package closes correctly
Reorder Control
- Tray version recorded
- Approved physical sample retained
This checklist helps turn a visually attractive tray into a functional packaging component.
Common Press On Nail Tray Mistakes
Designing the Tray Before the Nail
The finished product should determine tray requirements.
Measuring Only the Base Tip
Include 3D decoration.
Ignoring Curvature
Height depends on the full nail profile.
Putting Nails Too Close Together
Decorations may touch.
Holding Nails Too Tightly
Customers should be able to remove them safely.
Leaving Accessories Loose
Separate components where needed.
Using One Tray for Every Product
Long and dimensional nails may require another structure.
Approving Only a Digital Drawing
Physical testing is essential.
Ignoring Shipping Orientation
Packages may not remain upright.
Failing to Keep a Packaging Reference
Reorders should use the same approved tray specification.
Questions to Ask a Packaging or Nail Supplier
Before approving a tray, ask:
- Which nail shapes fit this tray?
- What is the maximum nail length?
- What is the available internal height?
- Can tray depth be adjusted?
- Can spacing be customized?
- How are 3D flowers protected?
- Can hero nails receive more clearance?
- Where will accessories be placed?
- Can the tray be tested with actual nail samples?
- Can several SKUs share the same tray?
- How will the approved tray be recorded for reorders?
These questions are more useful than simply asking whether custom press on nail packaging is available.
Conclusion
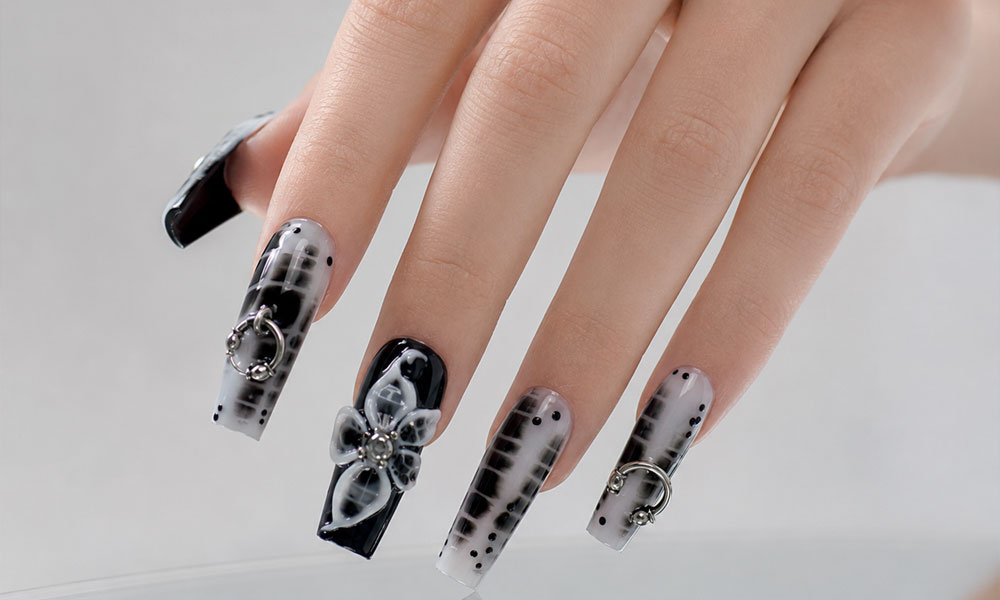
The tray is one of the most important functional elements inside press on nail packaging.
It affects:
- Product fit
- Nail movement
- Decoration protection
- Accessory organization
- Retail presentation
- Customer removal
- Reorder consistency
The correct tray should begin with the actual finished nail.
Measure the complete product, including curvature and 3D decoration. Check large and small nail sizes, give fragile hero nails enough clearance, and ensure accessories cannot move into the decorated nail area.
Brands should also physically test the package rather than approving only drawings. Rotate the completed set, check movement, examine contact points, and confirm that the same tray works with the actual shape and length intended for production.
For larger distribution programs, formal packaged-product testing can also help evaluate the complete shipping configuration, while environmental packaging claims should be specific and supportable rather than broad or vague.
If you are developing press on nail packaging for a private label collection, Xingyi’s customized services can support discussion of nail shapes, decoration, trays, boxes, branding, accessories, and complete set configuration.
You can also review the shape and size guide and handmade custom press-on nail collection when determining how much internal tray space your products need.
When your nail dimensions, decoration height, accessory list, box structure, and presentation requirements are ready, you can contact Xingyi to discuss a physical tray and packaging sample.